

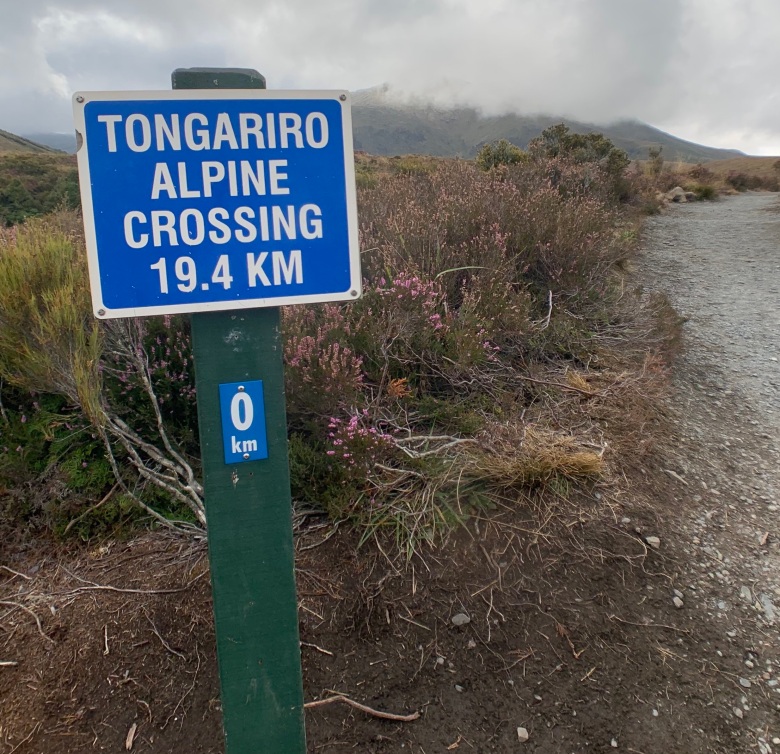
This 19.4 kilometre journey is commonly referred to as one of New Zealand’s Best Short Walks – and when you do it (which you definitely should) you will see why. The hike takes you through breathtaking scenery, from sparse fields, to green forests, to landscapes where the Mars Rover would feel right at home. It’s a trek that everyone should do – and no, you don’t need to be ultra-fit or an experienced hiker to complete it (trust me, I’m neither). Expect it to take you somewhere between six and eight hours walking at a reasonable pace with breaks.
In this guide, I’ll let you know everything you need to know for your planning, preparation and undertaking of this magnificent walk!
LOCATION:
The Tongariro Alpine Crossing is located in Tongariro National Park, close to Taupo in the centre of New Zealand’s North Island. For accommodation, I would recommend staying in Taupo township (it has a beautiful lake!) where there are heaps of cheap Airbnb’s to stay in. If you prefer, you can stay in the National Park itself at one of the various lodges – however these do come with a hefty price tag.
GETTING THERE:
Here’s the thing about the Alpine Crossing – it’s a one way walk, as opposed to a loop. That means unless you feel like adding even more k’s onto your journey, or you have a very dedicated friend to drop you off and pick you up, you’ll need to book one of the shuttle services.
There are a multitude of these services and to be honest they are all pretty much the same – if you drive to the National Park and catch one they’ll run you around $40 for the return trip back to your car, you will be able to choose a time slot in the morning to pick you up, and then you will catch one back in the afternoon. I would recommend choosing one that allows a flexible pickup time, because the time it takes to complete the walk can vary wildly between people.
If you’re staying in a nearby township you can also catch a shuttle from here – this will drive you the hour or so to the National Park and continue in to Taupo. TIP: Keep an eye out on BookMe for shuttle services to save a few dollars! Always book it at least the night before, although we did see some travellers pay cash to the driver so this is also possible.
While we took the 9am shuttle to allow us time to drive to the National Park we ended up being a bit rushed toward the end to make it to the final bus – I think the 8am shuttle would give a bit more peace of mind to make sure you can really take your time and enjoy the walk.
The final buses typically come around 5:30 or 6:00pm. The bus drivers will typically recommend if you are not at the second-last point by a certain time to call them there – as it’s the last point with reliable mobile phone reception. If you’re late most will charge you a $50 per person fee to be collected. It’s vital to call them though, as if you don’t they have to send police into the park searching for you.
COST:
The walk is free! The only thing you will need to shell out for is your shuttle ride, food, and any gear you want to hire – more on this later!
SUPPLIES:
This is not a trip you want to be unprepared for. Make sure you pack the following:
- Water – at least 2 litres per person as there is NOWHERE on the walk to purchase this and you will get thirsty. We took 4.5 litres between two of us and still found we were having to conserve it at the very end.
- Waterproof and windproof jacket – and trousers if you have it. At the very least, comfortable warm layers.
- Sturdy shoes – while hiking boots aren’t necessary try to avoid shoes that have a soft sole – a local told us it is extremely common for tourists to experience a cut sole of their shoe when wearing things like Nike Frees etc.
- Hat and gloves – even if it’s not particularly cold, you will be thankful for the gloves when needing to scrabble over loose rock.
- Sunscreen, sunglasses, and chapstick – the wind and sun are not a joke.
- First-aid kit – Bandaids could make the difference between an amazing journey and an awful one.
- Food – bring lunch and heaps of snacks. It’s very important to refuel constantly while hiking, so bring some muesli bars, nuts, and fruit (but not a banana, no one ends up eating it when it’s smushed at the bottom of your bag).
- Toilet paper – no one tells you this, but while there are toilets there is no toilet paper – we just happened to stash some squares at the last minute and boy did they come in handy.
- A bag for rubbish – take in what you take out – that’s the rule! There are no bins on this hike so bring a small zip-lock or plastic bag to stash yo trash.
We are huge advocates of travelling carry-on, so did we stash hiking shoes, a big daypack and a waterproof jacket? Naaaah. Thankfully, you do have the options to hire these kinds of things at the National Park Village. We stopped by SkiBiz the morning of our walk and paid really reasonable prices for a comfortable daypack and good jackets, although forwent the hiking shoes because we had good sneakers. Price indications are below:
Windproof/waterproof jackets – $10 for a light jacket and $15 for a heavy-duty full-length. (On our Summer walk the $10 was fine, but the staff will be able to advise you)
Day Pack – $10 – big enough to stash all of your water, food and layers. We shared one between two people.
Hiking Boots – $15
They also have hiking poles and overtrous available. While lots of people did take walking poles and they did look handy in some places they are also not necessary and you should be able to complete the walk without them.
RISKS:

Again, do not do this trip unprepared. While this walk is manageable even for inexperienced hikers, at least 57 people have died on the journey in the past ten years. In fact, while it used to be known as the Tongariro Crossing, the word ‘Alpine’ was added just a few years ago to alert walkers to the highly volatile condi
tions on the track. Due to the altitude the weather can change extremely quickly. Don’t be scared, but do be prepared. Also, rest assured that there are multiple points in the beginning where you can easily turn back – heaps of people come to just do the first part of the track so there is absolutely no shame in it either!
WHAT TO EXPECT ON YOUR JOURNEY:
The majority of people start the crossing from the Mangatepopo car park and end in the Ketetahi car park – why? It’s actually less time climbing. There are toilets right here at the start and also a lot of warning signs checking you are prepared – this is something they take really seriously!
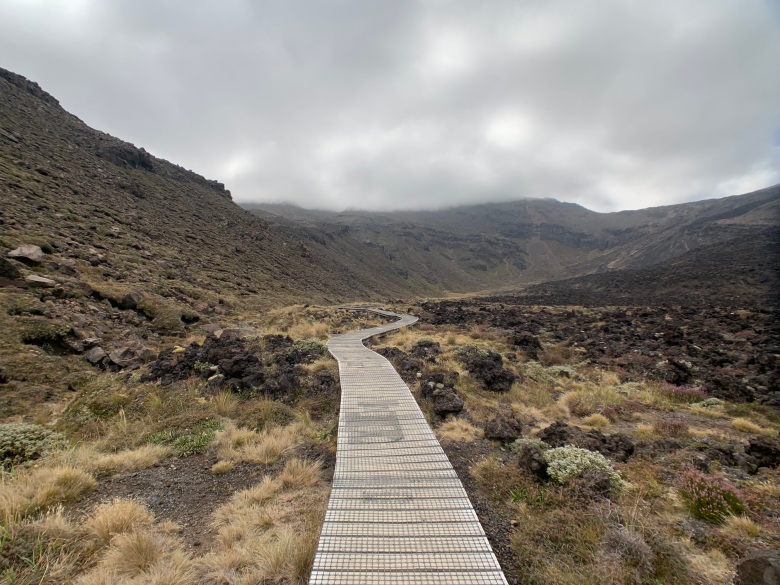
The first part of the walk is a gentle warmup – gravel paths and boardwalks will guide you through beautiful but sparse wilderness with mountains rising up on the horizon. Take a quick side-trip into Soda Springs if you are feeling particularly enthusiastic. Then prepare for the steepest part of the walk – The Devils Staircase. These seemingly endless stairs are very manageable – just take lots of breaks to rest your legs and catch you breath! In the meantime enjoy some spectacular views over where you just tramped. At the end you will have climbed up 200 metres, to 1600 metres above sea-level! Pat yourself on the back.
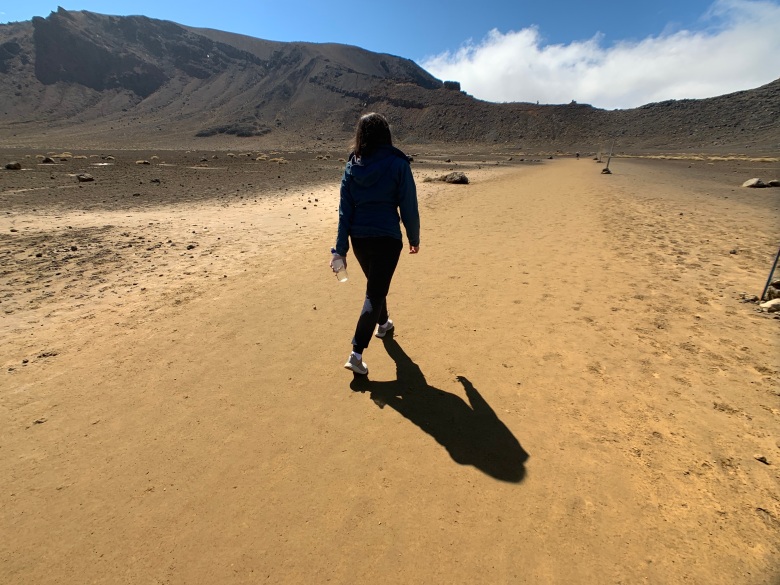
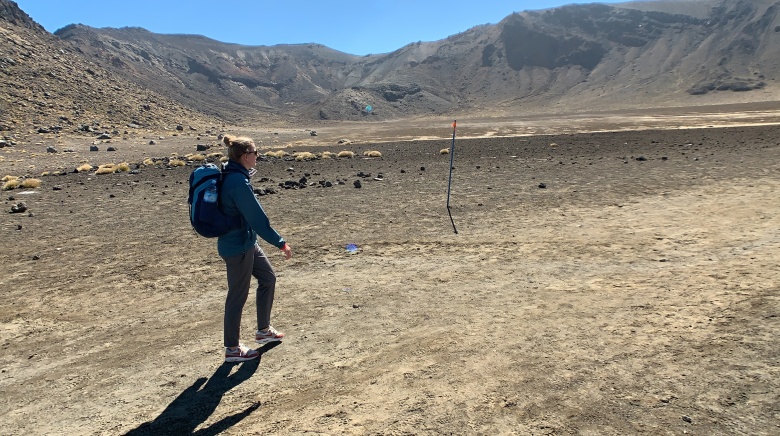
When you finish climbing you’ll find yourself on Mangatepopo Saddle, where more toilets are located – and also, thankfully, very flat terrain. The last toilets for a while are here so if you gotta go you gotta go now. From here you’ll walk steadily through the South Crater and enjoy the feeling of being on Mars. From here you can also choose to take a side-trip up Mt Ngauruhoe before continuing on.
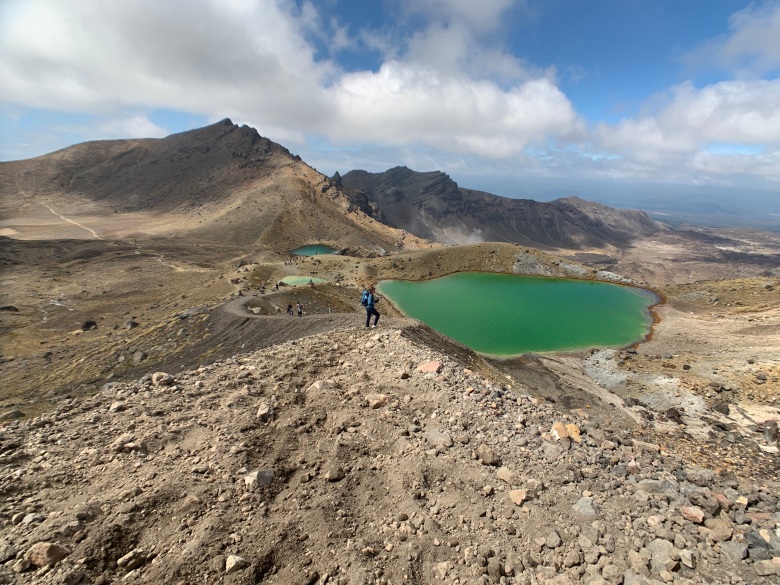
You have another short but steep climb to get to the ridge of the Red Crater – this climb can be loose and a bit slippery in some sections so just take your time. Enjoy the view at the top looking over the Oturere Valley, Rangipo Desert, Kaimanawa Ranges and down to the Emerald Lakes! Snap a selfie and then get going, because even though the climbing may be pretty-much done, going down can be just as much of a challenge.
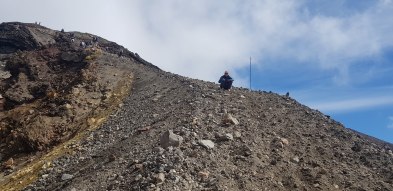 There is VERY loose scoria (volcanic rock) under you as you descend, and people will fall on their butts – including yourself. Choose a path you think you can follow and slowly make your way down. We chose to wear gloves on this part so we didn’t hurt our hands falling, and I would highly recommend doing this. The good news is you will have incredible views of some very brightly coloured lakes while you scrabble down to more even ground.
Take a rest stop here and brush the dust off your bum, but make sure you don’t eat around the Blue Lake – this is tapu, or sacred, and it is considered highly disrespectful to eat around its shores. From here it’s relatively easy walking and another set of toilets before you begin to zig-zag your way to the second-last stop at Ketetahi Hut. At this point it may feel like the end will be just around the next corner – but you will be wrong. It was here that we both put our own earphones in and relaxed for a while, enjoying the bends of the road while walking and listening to music or podcasts.
The final part of the track will enter a beautiful forest setting, but it’s not until you reach the stream that you will finally be nearing the finish line. It’s a few k’s through this section so just keep plodding along and ignore the aching feet and legs. Finally, you may hear the hum of an old bus engine cheering you on through the trees and hurrah! You will have made it!
As a side note, there are a few side trips you can take on the journey, including an option to summit Mt Tongariro – these are well signed along the way.
RECOVERY:
You worked really hard, and now you deserve a break! Make sure you have some food waiting for you back home (and maybe a few beers or bottle(s) of wine too!). You’ll be tired tonight, and the muscle soreness will really hit over the next two days. Take it easy!
That’s it! Hopefully you’re feeling incredible prepared and excited for this incredible walk – it was easily one of the most enjoyable experiences we had in New Zealand, so make sure it features in your itinerary!
